AUTOCAD CIVIL 3D TIP: HOW TO ADD NEW PIPES TO PRESSURE PIPE CATALOGS
Pressure Pipe Networks are fairly new to Civil 3D, and anyone who has worked with them has noticed that Civil 3D only comes loaded with ductile iron piping as an option in the parts catalog. Whether Autodesk adds more piping materials to the standard catalogs in future releases remains to be seen, but most users would like to see a PVC parts list at the very least at some point.
As for now, there are options to buy pre-made parts lists from private companies, but they can cost thousands of dollars. A more affordable option to those who really only use a handful of pressure pipe sizes/materials is to build your own, and import them into Civil 3D. No special software is needed, and a basic pipe size can be created and imported in a matter of minutes. Creating fittings and appurtenances is a bit more involved, but that will be covered in the next tip. Here are the steps for importing new pipe materials and sizes:
1) New Catalogs and pipes can be added very quickly through the Content Catalog Editor, which comes standard with the Civil 3D install. It can be found in the programs under Autodesk in the start menu under the Civil 3D folder. Open this program to begin.
2) Once within Content Catalog Editor, a user can choose to edit one of the stock Autodesk parts catalogs or create a new Catalog from scratch. The catalog databases are SQlite files. The “open” and “new” buttons are found on the upper left of the GUI. To open one of the Autodesk catalogs for editing, the directory for these in a default install is is C:/ProgramData/Autodesk/C3D2014/enu/Presure Pipes Catalog
SQlite Pipe Catalog Databases
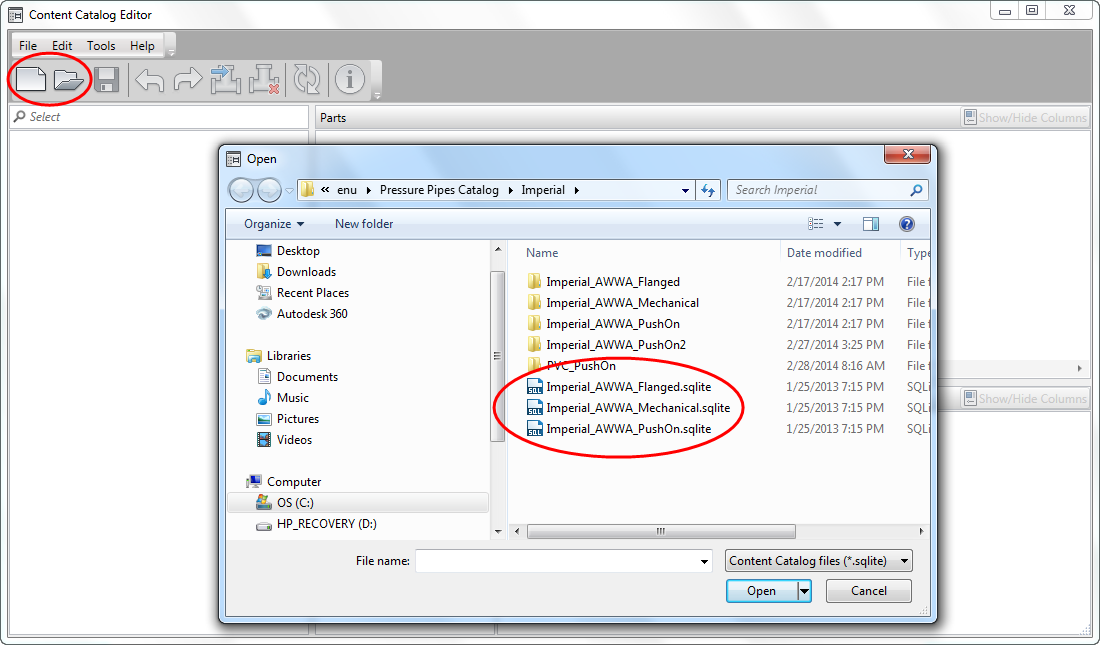
3) New pressure pipe catalogs should be saved in the same directory. When creating a new catalog, the user will be prompted to choose imperial or Metric units. After this is specified, click on the “save” icon to save the new database. The rest of the steps will be identical whether editing an existing catalog or creating a new one.
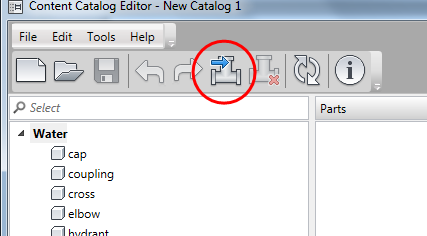
4) Next, click on the “import” button to start creating your new pipe.
“Import” button
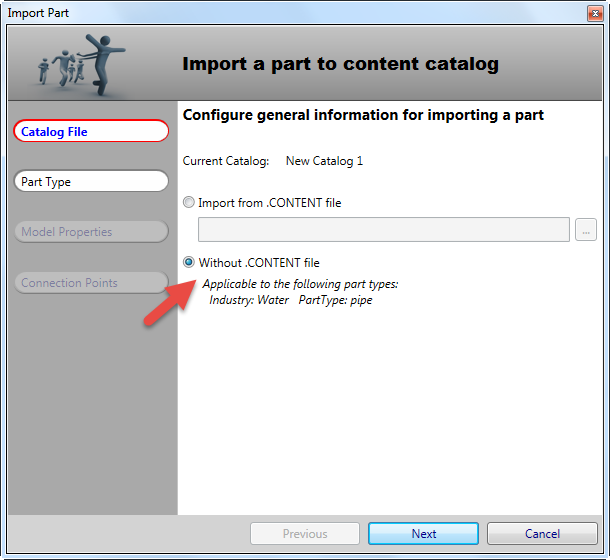
5) Pipes can be created “without.CONTENT file” so click on that option, and click “next”
Create a pipe without .CONTENT file
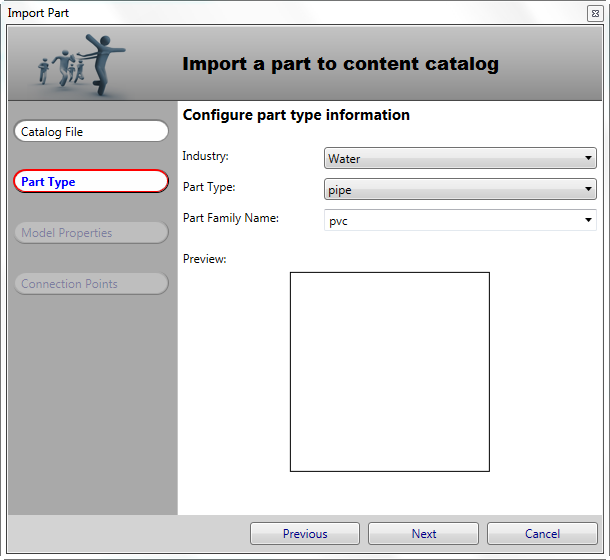
6) The next screen will ask for Industry, Part Type and Family Name. “Water” is the only Industry option, so select that. Likewise, “pipe” is the only part which can create without a .CONTENT file so select that. For this example, I am creating a PVC pipe part so I named my Part Family “pvc”. Click next.
Specify pipe type and Family Name
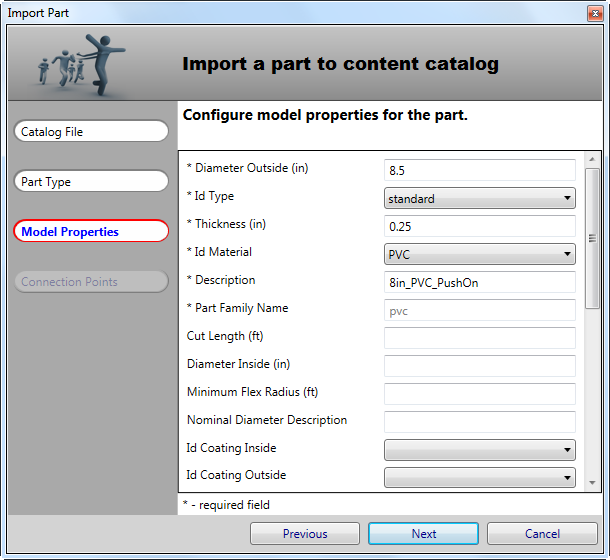
7) The next screen is where the model properties for the part will be set. It is best practice to aquire the part specifications from the manufacturer and fill in as many specifications as possible. This will help with pipe labeling and behavior. However, the fields with asterisks next to them are required. Click Next.
Specify Model Properties for new part
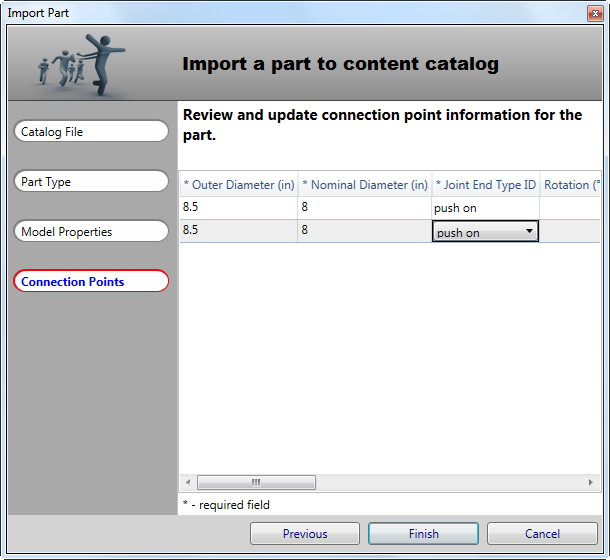
8) The final screen will set the connection points for the new pipe. As before, the fields with asterisks are required, but any additional parameters you have will help create a more complete part. Be sure that both rows are filled in identically.
Specify connection point information
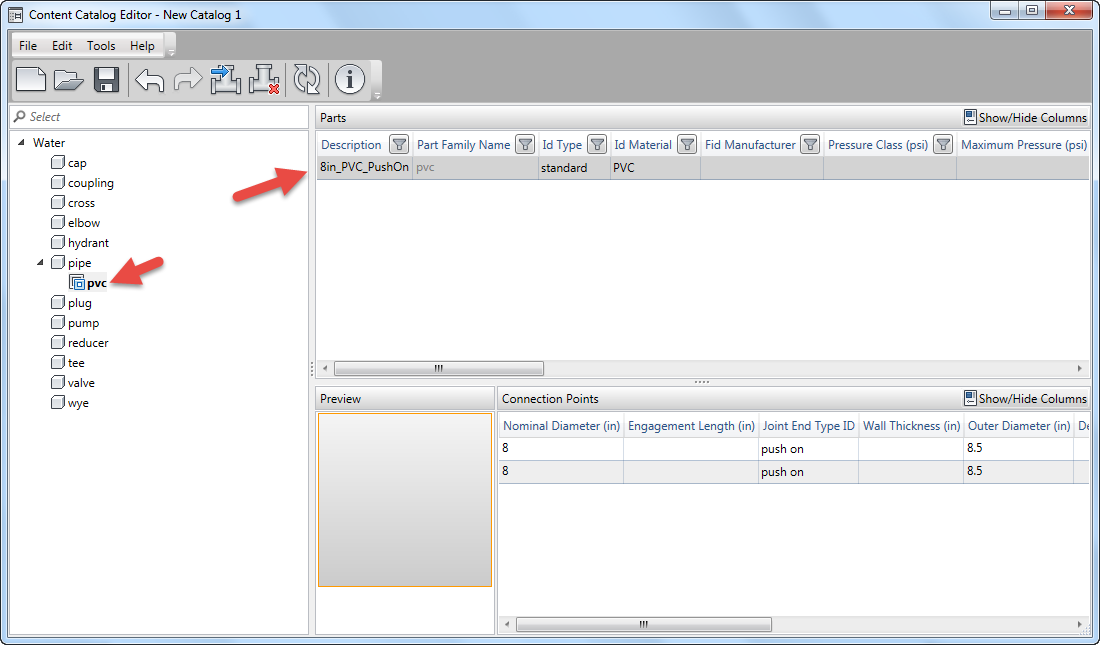
9) Click “Finish” and the new pipe will not show up in the catalog.
New pipe created in new catalog
There are now a few steps to follow before using the new pipe in Civil 3D.
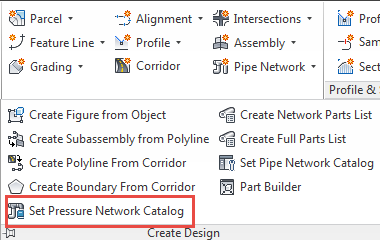
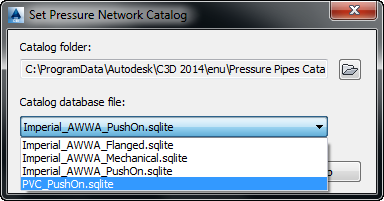
1) Whether in a new drawing or one already open, click on the “Create Design” fly-out on the “home” tab in Civil 3D and click on “Set Pressure Network Catalog”. From there you have the option to set which catalog is active in the drawing. If a new catalog was created, it will be shown in the drop-down selection options.
Set Pressure Network Catalog
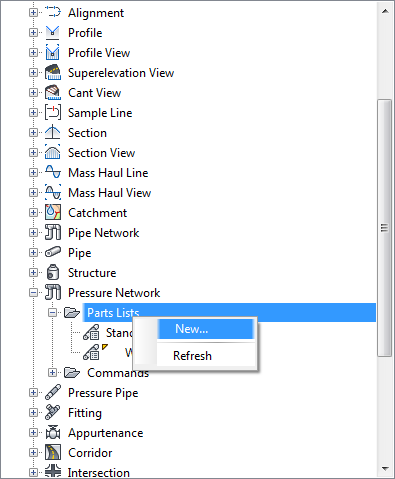
2) create a new parts list in the setting tab of toolspace under “Pressure Networks”. This step is important as the new parts will not be available to add to existing parts lists.
Create New Parts List
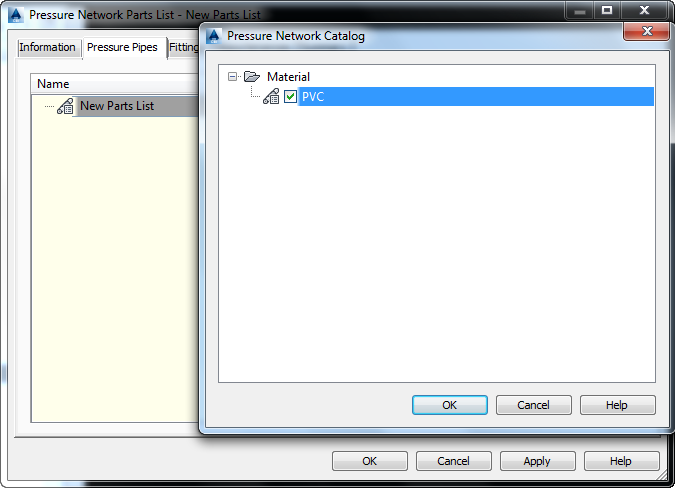
3) Add a new pipe material to the new parts list, and then add the new pipe size.
Add New Material and Part Size to New Parts List
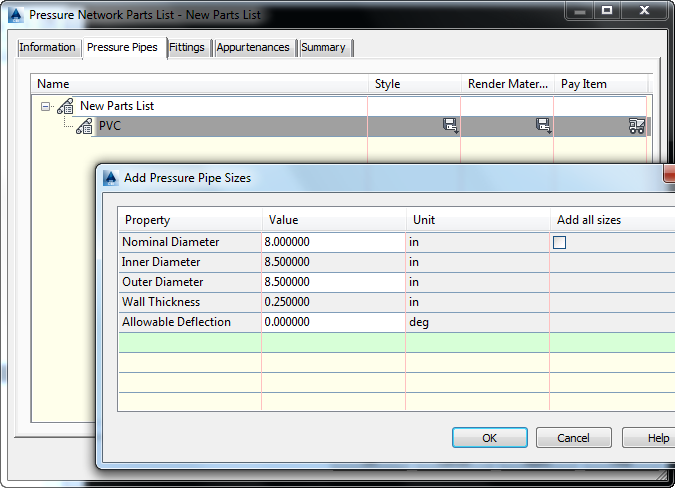
The new pipe is now ready to be used in designing pressure pipe networks.
Comments
Post a Comment